Thursday, June 30, 2011

Roasting Stick Bag


My family inspired me this last weekend to make bags for our Roasting Sticks.


This is the BEFORE. . .


This is the AFTER. . .

Here's how I made the bag. . .

1- Grab an old pair of jeans & cut the pant leg to the size of the roasting sticks (mine is 27" before hemming).


2- Turn the jean pant leg inside out & using a heavy duty needle, stitch the bottom closed.


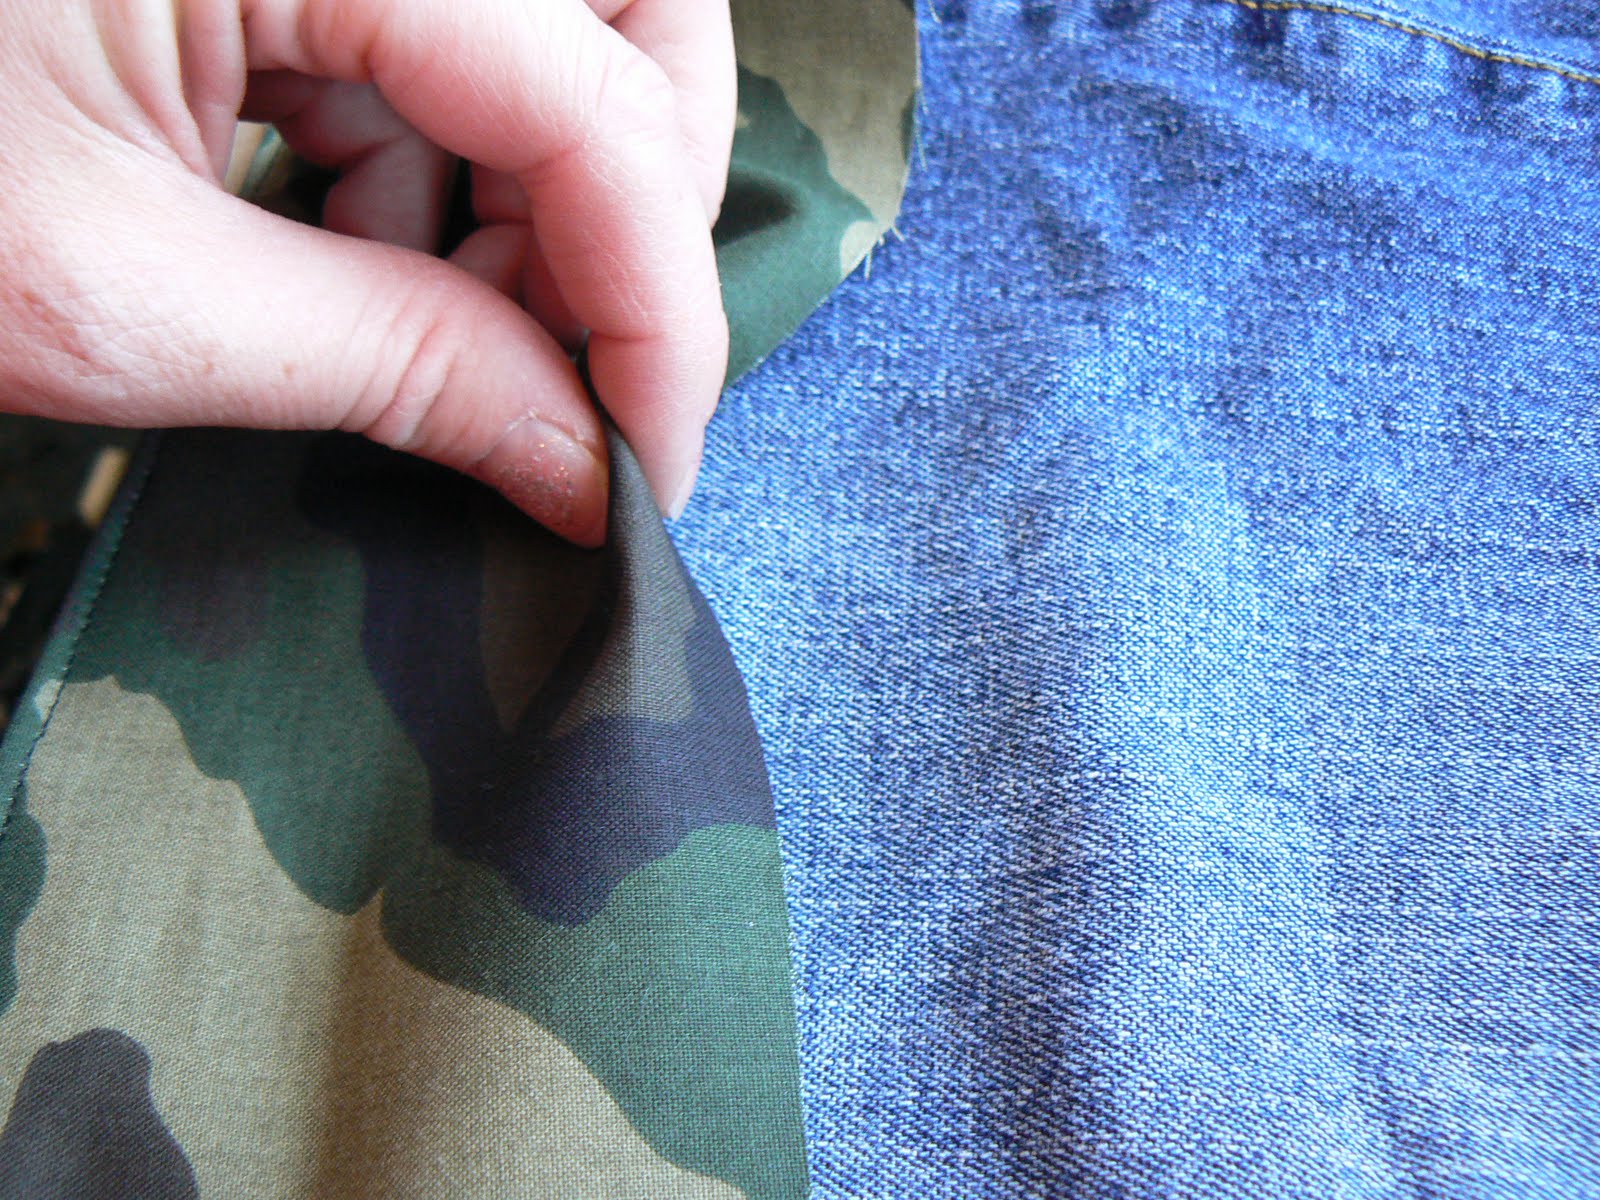
3- For the drawstring top, cut a piece of fabric to fit the diameter (x 4")of the pant leg. Put the ends right side together leaving an opening.


4- Pin the fabric right side to the wrong side of the jean. Stitch around.


5-Turn pant leg inside out and stitch around the top edge.


6- Fold the unfinished edge under & stitch around the pant leg making the casing for the string.


7- Thread ribbon or string in the hole of the casing.


8- Use your CREATIVITY to draw pictures/words on the bag.

[After thought: I might have to sew on a piece of ribbon for hanging.]


This is our fire pit area in our backyard. The large pit is for roasting marshmallows/hot dogs & camp wood burning. The smaller pit is for our dutch ovens. Pin It

Tuesday, June 28, 2011

{Pumpkin} Chocolate Cookies

I know its summer but I crave pumpkin desserts.
I found this EASY cookie recipe-so yummy!

Ingredients: 1 box spice cake mix(dry), 1 (15 oz.) can pumpkin, 1 (12 oz) bag chocolate chips
Mix together and scoop onto greased cookie sheet.
Bake @ 350 for 13-15 mins.

Enjoy!! Pin It

Saturday, June 25, 2011

Pioneer Day Celebration Posters

I was asked to make some posters for our church buildings highlighting the event our Stake is going to celebrate. In July we celebrate our Pioneers.

I of course couldn't just do a simple writing on the poster board-I had to Heatherize it!


I used this scrapbooking spray ink to wet the edges.


Then I wiped it.


I used postal paper, crumbled it many times, & taped it to the poster board. Then using the 1/8" hole punch, I punched around each edge. I threaded the hemp string(found at Walmart in jewelry section) through each hole to "sew" around the whole poster board. After this I used my firestarter to burn the edges. CAUTION: do this outside & do small sections so you can put the fire out with your shoe!

[Adhere Picture: taken from the cover of the July 2010 Friend Magazine] Pin It

Wednesday, June 22, 2011

Pattern Art


I love how these turned out-so simple!


One daughter used paper.


My other daughter used wood. Pin It

Monday, June 20, 2011

{Summer Time} Idea Container


Now that our kids are out of school we can have some Summer Time Fun.
Even though we will have the lazy days of summer, we still need some consistency. I'm going to refer back to the the schedule I made last year but add the twist of more outdoor games. I want us to enjoy the beauty of the sun & nature.


We bought this container(at a local restaurant supply store) for our concession business but haven't had a need for it lately so I'm putting it to good use. The lid is labeled with the days of the week(with stickers).


I thought it would be fun to have ideas for each day (except Sunday) where we could play different types of games. The idea categories. . .
Monday- Games with Round objects (balls/balloons & beanbags)
Tuesday- Games with water
Wednesday- Games with recycled items
Thursday- Games in nature (park/birdfeeders,etc...)
Friday- Games with a race
Saturday- Games on the sidewalk(chalk) & flashlight games

I will try to post any of these game ideas I do but most of them come from Family Fun Magazine.
Pin It

Simple Message


I know this is Message is Super Simple but for Father's Day this was my husbands surprise for breakfast. I used the squeeze bottles to do the ketchup one & a knife to do the jam one. Pin It

Wednesday, June 15, 2011

End of School Gifts {2011}

Our kids get out of school this week-Ya!
At the end of the school year I like to do an extra nice gift for the teachers to show my appreciation for teaching our children. This year I used stuff I already had at home.

Binder Clips:

I just covered these with fabric using Mod Podge.

Dice(4"x4"):

Painted.

Making the dots.

Burned.

Tool used to burn the dots(found at Michael's Craft store).

Start/Stop Sign:

The sign comes out of the hole so the sign or stand can be used separately. Pin It

Wednesday, June 8, 2011

Art Day Idea

Today was the last Art project for the year. I wanted it to be extra special.


[I did each child's name in vinyl, took out the positive part and had them stick it onto some wood(the backside of beadboard).]
I used permanent markers but they used crayons & colored pencils(pencils worked awesome!).

It was fun to see the creativity that these kids have- it was impressing! Pin It

Monday, June 6, 2011

Tidbits of Ideas {Wedding #1}

I had to post some fun ideas my SIL Fabiana did this last weekend at my niece's wedding.


Reserved place for the Bride & Groom to sit for dinner.


Make your own Italian sodas (with cute labels).


Ice Cream Bar with all the toppings.


Simple card (on both sides) about the BridesMaids & GroomsMans & how they each know the Bride & Groom.


Easels with pictures & draped fabric placed throughout the reception hall.


I love him/her boards.


Flower Balls hanging from the trees.


Sign in book (made from all the engagment pictures).


The cake I made (my SIL put it together cause I had to work). Don't those flowers look so real? It was a great challenge but I think I will stick to cupcakes!!


Me & the Bride


Our CUTE kids in PINK.
Pin It

Friday, June 3, 2011

{Spray Paint} is my Friend

For the wedding tomorrow I needed to make a hair accessory for our oldest daughter. They had some at Claire's but I couldn't pay $6.00 for one.

Its hard to find black flowers, so I took matters into my own hands. I went to the dollar store, got headbands(package of 3) & a fake flower bunch = $2.00. My kind of savings.

I took my black spray paint & PAINTED it. A new flower. . .

I know its hard to see because everything is black but I put 3 black flowers together with a pearl bead as the center & hot glued them to the headband.
Pin It

Thursday, June 2, 2011

Flower Girl Accessories

Our two youngest daughters are the flower girls for my niece's wedding(in 2 days) so I made a headband to go with their dresses & altered a basket.

Hair Cuties {#2}: idea taken from this earlier post.

I mixed up the different fabrics with cutout circles & flowers.


Flower Basket-it was just plain white.
Pin It

LinkWithin

Related Posts with Thumbnails