Friday, April 30, 2010

Dishwasher {MAGIC}

Sharing a BIG dishwasher tip: Dishwasher Magic.
This stuff truely is MAGIC!
I am so excited to have clean dishes! A few months back our dishwasher started to leave a film & left over food on the "clean" dishes. I've had to handwash and its not fun when you have 6 people using the dishes. We had a repair man come and he told use we have hard water and a water softener would be great ($1500.00-$2400.00-too much right now) but then he did mention to give this product a try. That was one of the best $4.00 (Walmart)we have spent! I will be doing this once a month(recommended) to keep our dishes clean! Pin It

1 Year Advice


The other day as I was going thru our wedding memorabilia I found letters of advice that I could only open 1 year after we were married. So I decided to put them in a book for safe keeping. This was a great idea my aunt had for the Bridal Shower but you could easily do this for a Baby Shower for a new mom!


1-Cut 2 pieces of fabric and 1 piece of Heat n' Bond all the same(mine measured to fit 5x7 sheets of paper).


2-Iron the Heat n' Bond to one side of the fabric.


3-Remove paper sheet.


4-Put other piece of fabric on top and iron (this will give the "book cover" durability).


5-Stitch around all 4 sides. Fray the edge.


6-Stack paper on top of fabric (depending on how many letter of advice you received).


7-Tape in all the "advice" papers on each colored "page".

Now after 12 years of marriage its fun to reread the wonderful advice given and see how I have done. I will cherish these always! Pin It

Thursday, April 29, 2010

Hair Accessories Holder


I was so inspired by Angela to make some hair accessories(thanks Ang!) that I needed to make a holder for them.


1-A cupboard door (a picture frame would work also) with a beadboard insert.


2-Spray painted it black.


3-For the ribbon part: Fold a piece of fabric(4 inches in length) in 1/2 and put the ends into the middle then put the white ribbon in between them.


4-Sew around each side forming a square.


5-Glue the ribbon onto the back of the board.


6-I did a bead of glue around the edge then sprinkled it with glitter.


7-I love how the vinyl lettering came out: "I am Divine". I love what the word "divine" means. I wanted my girls to have a daily reminder that they are Divine (the pretty hair clips are just a bonus). Then in the top corners I put some hooks for the headbands. Now all I have to do is make some more hair clips to fill up the ribbons. I'm so excited. Oh, the possiblilities! Pin It

Tuesday, April 27, 2010

Sewing Machine Cover


I got a new Sewing machine for Christmas so I finally got a cover made for it. I am born from a family of sowers. This was a really good piece of advice that my mom gave to me regarding sewing. It was to make sure the machine was always covered so the dust doesn't get into the machine to ruin it. Thanks Mom!


1-I looked at this one and realized a simple hand towel from Walmart would do{only $2.50}. I love brown and stripes so this one was perfect!


2-Cut your desired ribbon 12 inches in length x4.


3-Measure 5 inches from the bottom and sew on the ribbon.


4-I just attached a bead at the end of the ribbon so it doesn't fray{& so it looks even that much cuter}.


5-I also did a matching one for my Cricket. Pin It

Monday, April 26, 2010

Ang's Flower Clip Tutorial


Flower clips are very easy to make! However, done right they can be a little more time-consuming than they look (maybe only for ME because I'm an extreme perfectionist). I've made them to sell in the past, but the price is never equal to the time I put into them.

So I make them for my daughters, as gifts for my nieces, as baby gifts for friends; and of course my daughters' friends [and moms] anticipate them at their birthday parties!

Here is how I make my flower clips!...
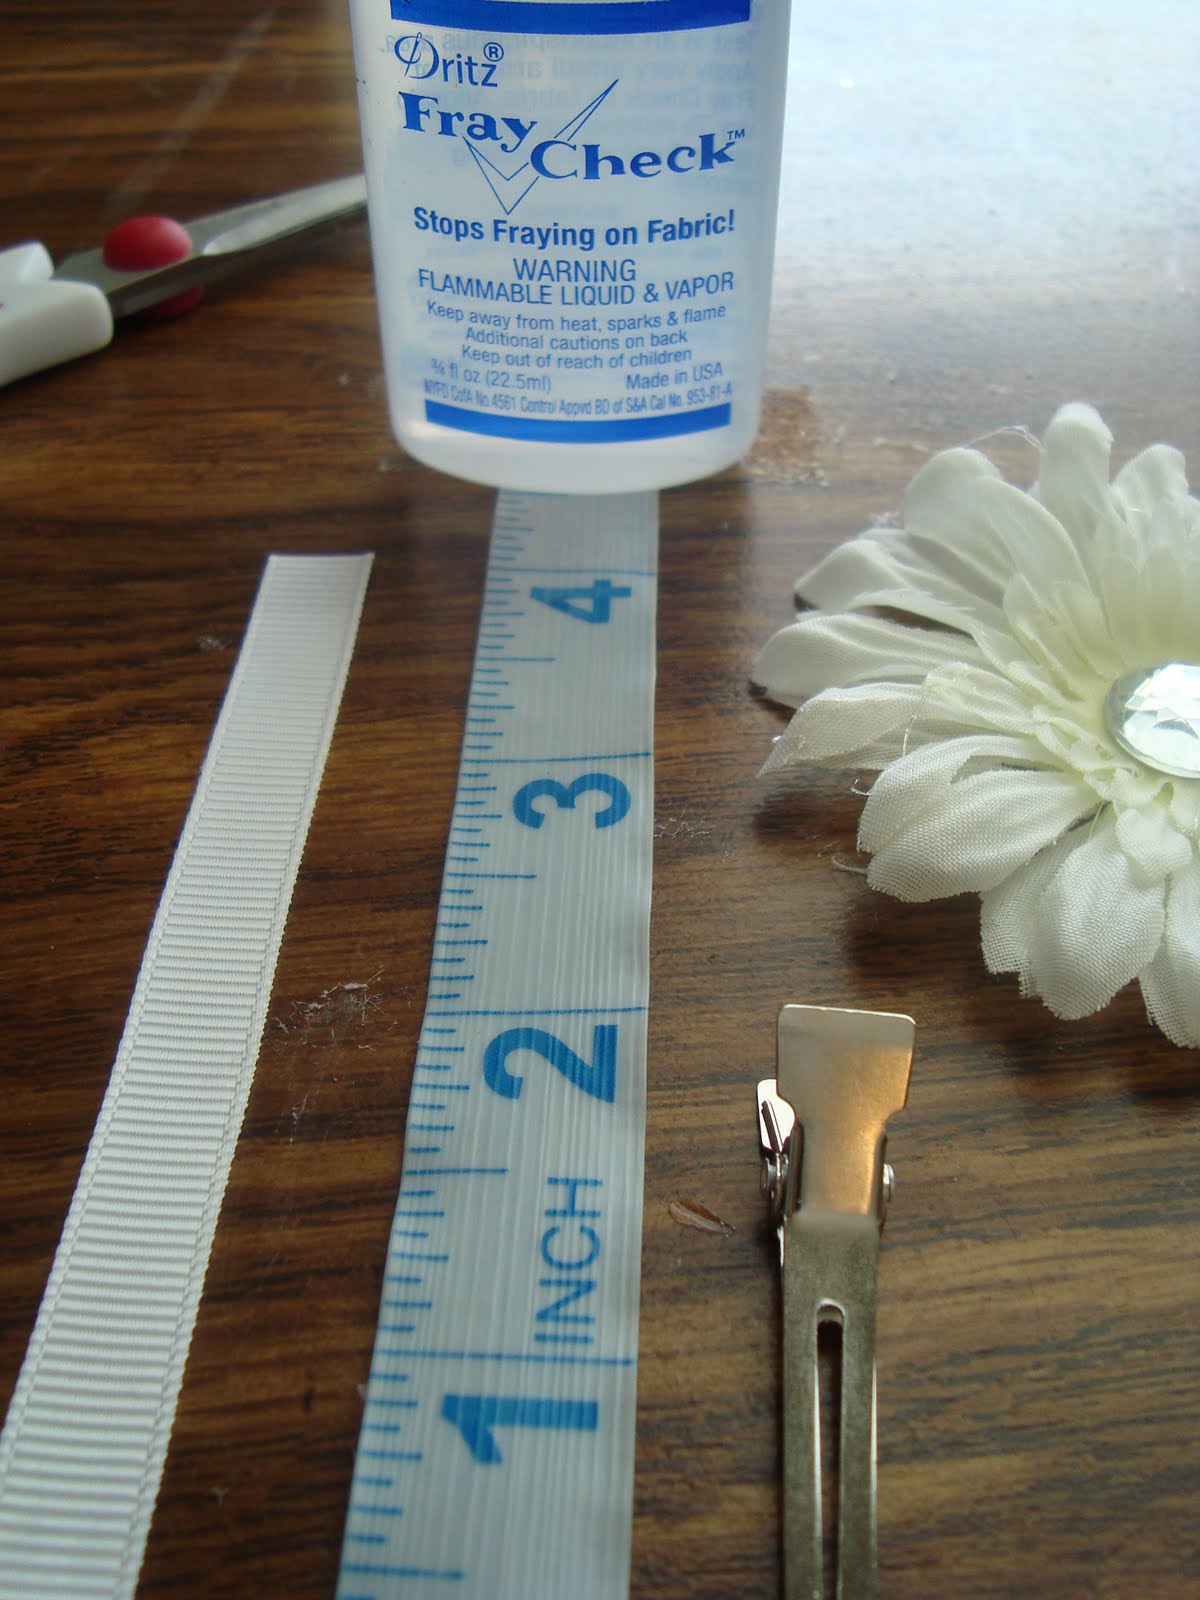


What you will need:

Alligator Clips (I like the 2" single prong clips)

Silk Flowers (Where ever you can find them. Various craft stores, Walmart, or even the dollar store!)

3/8" Ribbon (Craft/Fabric stores or Walmart. I like the grossgrain ribbon best.)

Fray Check (Found in the "Sewing Notions" section)

Glue Gun and Hot-Glue sticks

Craft/Fabric Scissors

Jewels, Buttons, Etc. (Craft stores)

What you will DO:

1- Cut 4" of ribbon, and gently wet each end with Fray Check. Set aside to dry.

2- Pull flower off plastic stem, then pull off all plastic parts (so you are left with just the pedals).


*Discard all the plastic parts; unless you like the middle, in which case you would just snip off the remaining stem and set aside to glue back onto the top.

*Steps 1 & 2 are significant in keeping the flower- (esp. a gerber daisy)- flat for glueing to the clip.

3- Starting at the bottom layer, glue each layer of flower pedals back together.

4- Glue on a jewel and/or button on the top/center of flower (or use original center if you prefer). Set finished flower aside.

5- (Have clip ready!) Take the 4" ribbon and apply hot-glue to half. Quickly put glue gun down and grab the clip, pinching it open. slide the ribbon onto the under-side of the top of clip and press to adhere.

6- Finish glueing on top, fold and press the ribbon down quickly. Then turn clip over and glue a little hot-glue to back, pressing ribbon over that.


7- Turn flower over and glue clip (ribbon-covered side) to back/bottom of flower. YOU'RE DONE! Enjoy your cute flower clip!


MY EXTRA TIPS and SECRETS...
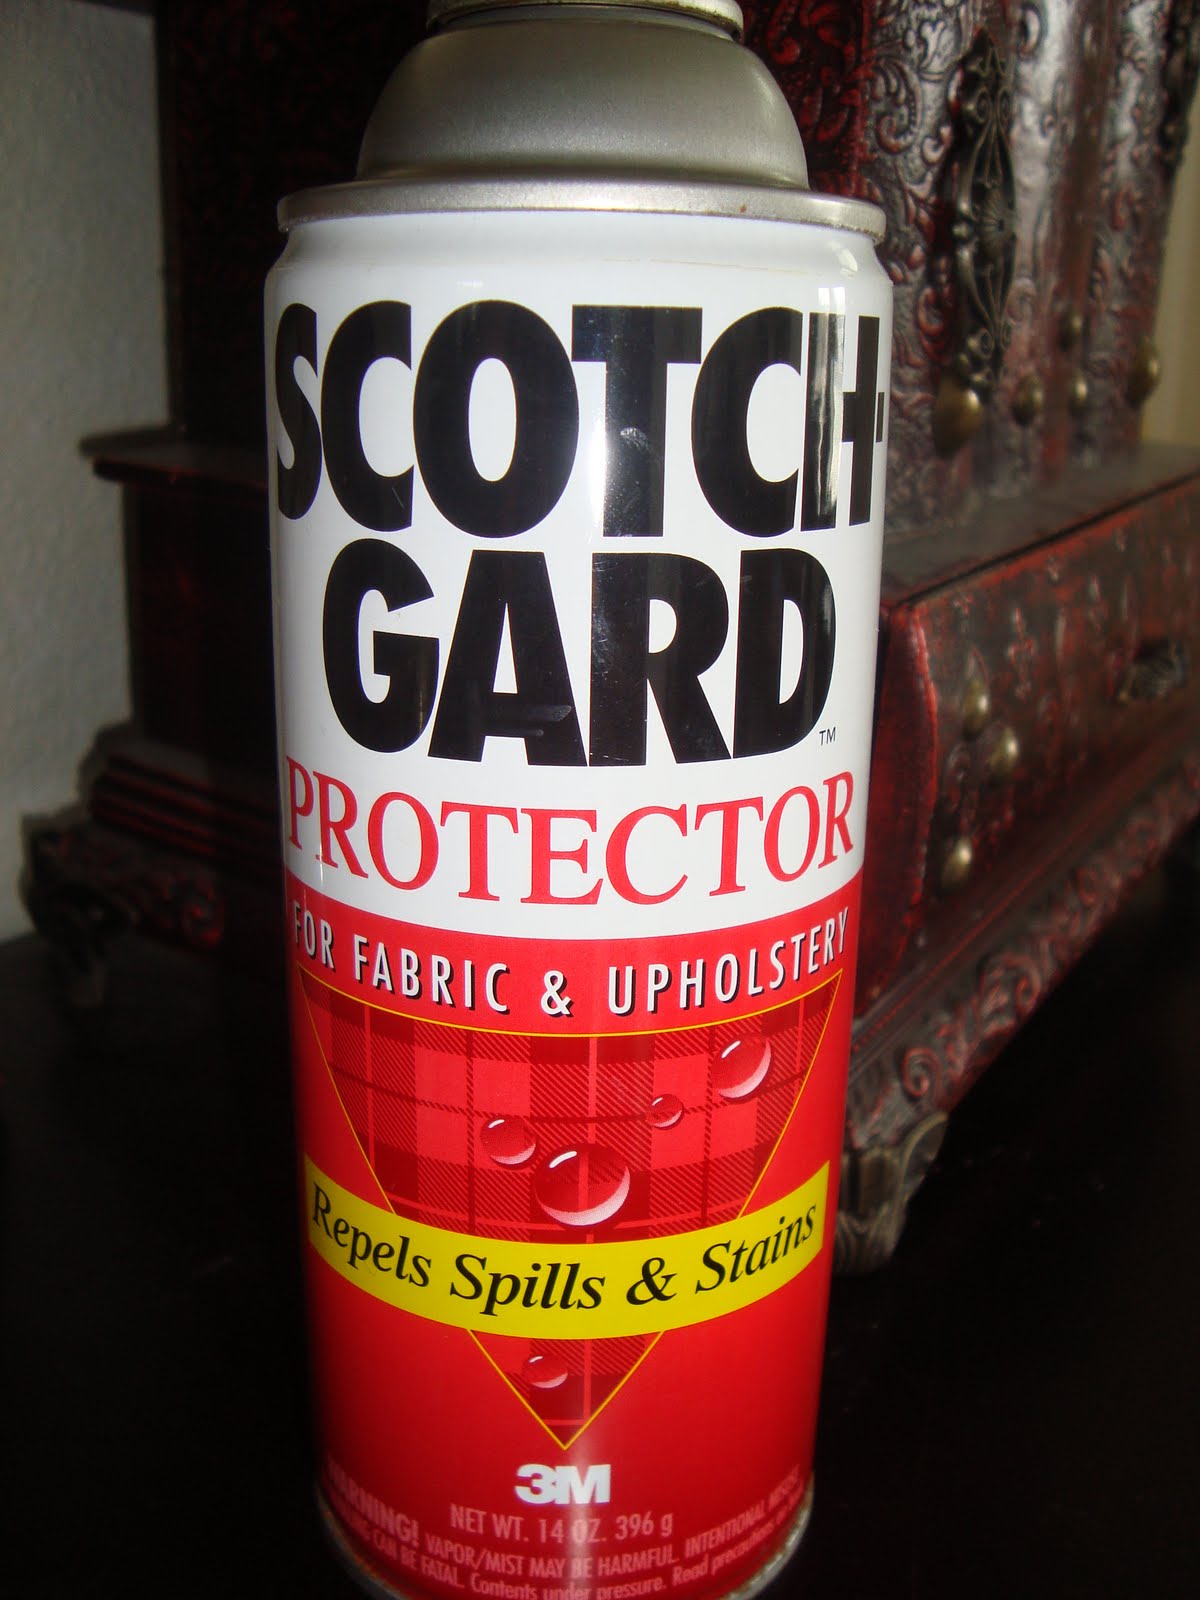
*Spray Scotch Guard onto finished flower clip for extra protection against dirt and dinge.

*Add some "grip" to the clip by hot-glueing some cupboard liner to the under-side (over the ribbon).

*Do not store flower clips in a drawer! Clip them to a long piece of ribbon that you hang from the wall. This will #1, keep them from getting frumpy and #2, organize them nicely for easy finding!

*To clean, wipe with damp cloth. Or you can carefully rinse in slightly soapy water and lay flat to dry.

**Coming soon... My own Creative Homemaker Etsy shop!! It will have hair-clip organizers, as well as DIY kits for flower clips. Stay tuned, and I will post about it as soon as I get it going!!** Pin It

Friday, April 23, 2010

Cherishing {Baby's First Year}


I was fliping thru my Paper Trends Magazine the other day and Maggie had a great idea to use a notebook to journal the first year of a baby's life. Since my friend, Tristin just had a cute baby boy I knew this would help her in writing down those precious moments.


1-I just covered the front & back with Scrapbook paper. And then added a simple tag.


2-Cover inside covers with paper also.


3-I punched some tabs from paper(Maggie used ribbon).


4-Then I stapled the tabs to the lined paper. (I counted 8 sheets for every month)


5-First Page. . .


6-I titled the first page for each month.


Journaling is so Fun! Pin It

LinkWithin

Related Posts with Thumbnails