Saturday, June 30, 2012

Alia's Lemonade Stand

Here she is... my Lemonade Stand project, completed!!

I don't know about yours, but my kids LOVE to sell lemonade on hot, summer days! As a mom, it can be kind of a pain to help them set up a lemonade stand. So a few years ago I made a cute banner and put together a tote of necessary lemonade stand supplies. That way, all we needed to add was a table, some shade, and a pitcher of lemonade.

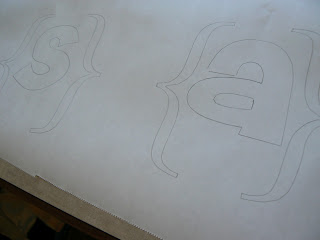
Since then, I've had a dream to build an actual lemonade stand for my kids. A year ago I opened up my little notebook and sketched out the picture and plan that I'd had in my head for a long time...

Since that time (last summer) I kept my eyes open at thrift stores for the perfect rolling desk/cart that would be the base of my project. A few months ago I found this one at Deseret Industries. Luckily I had my daughter there with me to size it up with!

A few weeks ago I finally tackled this long-awaited project and made our dream come true! It took me a straight 3 days to build and paint. (My husband is amazing with carpentry, so he helped me a lot with the construction part, and the rest I did by myself.)

I wanted to be able to share a tutorial for this project here for you, but I kind of just created as I went. So I will give as much info possible, and the rest you can use as inspiration!

These are the colors I chose to paint my stand: Warm Yellow, Berry Pink, and Key Lime. All from Home Depot, all gloss finish (other than the chalkboard paint). I have not used the lime yet, but may use it to accent a few little things I add to the stand later. I also used a white base coat spray paint beforehand.
After the base coat, I painted all the yellow first. I taped off the parts behind the frame to paint the pink. Then I painted on the chalkboard with a small roller and brush for the edges.

We built the top canopy with the ability to be detatched, using 4 carriage bolts, so it will be able to fit inside our vehicle if we wanted to take it anywhere. I used some off-white canvas that I already had, for the canopy top, and used lots of Fray Check on the scalloped ends. Then I taped off and spray painted the canvas to match the rest.

I chose to use a rolling computer desk because it was the perfect height for my kids, has a rolling [keyboard] shelf, and a bottom shelf as well. Also because it had [locking] wheels.
We just added a full back to it and lowered the rolling shelf dow a few inches. We also added "lips" to the outside of the shelves to keep things from falling out. Then we finished the front by "framing" the chalkboard with some other wood scraps we had lying around.

I found the cute lemon stuff from Target's dollar spot, the material at Walmart, and the cash register at the Godwill.

I found these cute pink aprons at Hobby Lobby.

Other necessary items: Chalk and Eraser (dollar store), Hand Sani, Lemonade Mix (less-expensive to buy the sugar-free, generic brand), Plastic Cups (these are 9oz cups, 80ct for just over $2- best price so far!). The big spout-container is plastic (a MUST), and I found it at Walmart. (I added the ribbon for fun.)

Problems that came up, and our solution to fix them: I found out real fast that castor wheels are not meant for concrete. We plan to fix this problem with some used stroller wheels (that lock as well- very important).

Finally toward the end of this project, I went online to look for even more lemonade stand inspiration. Here are some sites I found and LOVE. These ladies are so creative and even have free printables! I can't wait to go spend more time on their sites. A big THANK YOU to these talented women for their beautiful work and inspiration:


I definately plan to use some of the beautiful printables from these talented women listed above! I also plan on fixing the wheels and adding a handle for pushing/pulling the stand down the driveway and sidewalk.
And there you have it, friends!

I got this done just in time for my daughter's 7th birthday. Happy birthday Alia!!
Pin It

Friday, June 29, 2012

ABC Summer "J" Day

Today is letter "J".
1. Eat "J" Foods: jam, jelly, jell-o, jerky, juice, jelly beans, jambalaya, jelly donuts
2. Jewelry (made out of magazines)
Take a page out of a magazine. Cut in 1/2.
Fold in 1/2.
Fold in 1/2 again.
Fold in 1/2 for the third time.
To start rolling it, use a skewer stick.
Roll it up. I use both hands. Right to hold the coil. Left to straighten out the remaining paper strip as I coil(it tends to want to buckle a little).
At the end fold it down so you hot glue it. It gives it a more finished look.
You are done with 1 "petal" of the flower.
All done rolling -ready to hot glue together(I use felt for the back).
Some other ones I made into necklace pendants.
3. Joke time.
4. Jump (on trampoline or rope).
5. Jean crafts.
6. Jog.
7. Juggle.
Pin It Pin It

Thursday, June 28, 2012

ABC Summer "I" Day

Today is letter "I".
1. Eat "I" Foods: ice cream, ice, iceberg lettuce, Italian bread(but anything Italian will make the day)
2. Make Ice Cream .
3. Ice skating.
4. Ice blocking.
5. Iron crafts.
Using your stencils, trace onto the freezer paper. I left space under the "initial" so they could write their name.
Cut out the negative paper of the image with a knife.
Iron (cotton setting) the freezer paper onto the fabric. Make sure there are no bubbles or the paint will seep underneath.
 Paint your design. We used Creamcoat acrylic paint.
After it has dried, you can either frame it or add more fabric to make a mini bag. 
6. "Initials" of child.
7. Indoor campout.
Pin It Pin It

ABC Summer "H" Day

Today is letter "H".
1. Eat "H" Foods: ham, hamburger, hash, hawaiian haystacks, hot chocolate, honey butter, hoagie sandwich, hazelnuts, honeydew melon, hot dogs
2. Hike.
3. Hula Hoop contest.
4. Hide & Seek game.
5. Hair Do styles.
6. Horseshoes(play at the park)
7. Hospital-do some service.
These are the Baby Blankets(out of sheets) for the NICU. They are always in need of blankets so this would be a great project to do all year long.
I got some fabric from my mom and soft bed sheets(from the second hand store). Cut the fabric & sheets to 45"x 45". Pin right sides together. Sew all the way around.
Then turn the right sides out, iron then stitch all the way around again. 1/2" seam.
Pin a square in the middle so you can stitch it, it will help the fabric to not bunch up.

 All Done!
Pin It Pin It

Tuesday, June 26, 2012

ABC Summer "G" Day

Today is letter "G".
1. Eat "G" Foods: garbanzo beans, garlic bread, gatorade, graham crackers, granola, grapefruit, grapes, green beans, ground beef, gingerbread/cookies, german pancakes.
2. Wear Gray or Green
3. Gifts (make something to brighten someone else's day)
4. Graveyard Scavenger Hunt
5. Glue art/craft (here's one that looks fun)
6. Games-of any sort.
Pin It Pin It

Monday, June 25, 2012

ABC Summer "F" Day

Today is letter "F".
1 Eat "F" Foods: fish, fish crackers, fondue, fruit cocktail, fruit roll ups, french fries, french toast, fortune cookies, french bread, fried rice, fruit, frosting, figs
2. Frisbee golf.
3. Family Flags.
4. Fishing.
5. Flannel board stories.
6. Friend hang out time.
7. Footprint art (I love the butterfly look)
8. Fabric Flowers.
9. Felt craft.
10. Funny Faces contest.

Pin It Pin It

Friday, June 22, 2012

ABC Summer "E" Day

Today is letter "E".
1 Eat "E" Foods: eggs, eggplant, english muffins, egg drop soup, egg rolls, enchiladas, eggnog
2. Exercise.
3. Eat out.
4. Egg carton crafts.
5. Read the Ensign.
6. Envelope craft.

Pin It Pin It

Thursday, June 21, 2012

ABC Summer "D" Day

Today is letter "D".
1 Eat "D" Foods: deviled eggs, dill pickles, dip, dates, dried fruit,dressing, doughnuts, dumplings
2. Dictionary game-have to learn a new word & use it all day.
3. Dodge ball.
4. Dance contest.
5. Doodle art.
6. Draw.
7. Decode a message.
8. Dot art (use a q-tip & paint).

Pin It Pin It

Wednesday, June 20, 2012

ABC Summer "C" Day

Today is letter "C".
1. Eat "C" Foods: cabbage, cake, cantaloupe, carrot(anything), cashews, casserole, cauliflower, cobbler, cocoa, coconut, coleslaw, corn bread, corn dogs, cookies, cottage cheese, crab, crackers, cranberries, cream cheese, cucumbers, cupcakes, cereal, custard.
2. Card games.
3. Card making.
4. Clay crafts.
5. Crayon art.
6. Start a Collection.
7. Make COOKIES.
8. Race toy Cars.
9. Make a Candy Gram & give it to someone to brighten their day.
10. Cloud watching.

Pin It Pin It

Tuesday, June 19, 2012

French Waffles

"Mom, can I make breakfast?" is something I hear often on summer mornings. How about waffles? Or maybe French toast? Yum! Two of my faves. Why not do BOTH? In ONE?


My good friend Tristin T. did just that. She combined French toast and waffles and called it "French Waffles". Perfect! And it's super simple: Simply make French toast like you normally would- bread dipped in egg mixture, and cook it on your hot, Pam-sprayed waffle iron. Walla! French Waffles.
*Tristen says she makes a bunch of these at a time and freezes them for re-heating. Great idea for a quick meal!
Pin It

ABC Summer "B" Day

Today is letter "B".
1. Eat "B" Foods: bacon, bagels, baked beans, bread, bananas, beef, berries, biscuits, blueberry pancakes/muffins, bran cereals, bread sticks, bread pudding, broccoli, brown rice, burgers on buns, buttermilk, butterscotch pudding (BELOW: blueberry muffins & biscuits made from mixes just add blueberries)
2. Wear Brown, Black or Blue.
3. Bike ride.
4. Bowling.
5. Bean Bag games.( I gained the idea from a catering job we did for a graduate)
Drill 3 holes into a top board (21 3/4"x36").
Build the frame with 2x4's (3 @ 18 3/4", 2 @ 36"). I used my brad nail gun and wood glue.
Put the top board on.
Cut 2 leg pieces(11" long). I did a slit angle cut (15 degrees) so it would sit better in the grass.
Painted with stripes.
I used these bolts(about 4" long).
Drill (13/32 bit) into the side and leg.
Attach the leg with the bolt and a washer in between.
 Game directions: Place the 2 Toss Boards away from each other(you choose the distance) and let people line up on each side. Taking turns they throw the bean bags to the opposite toss board. If it lands anywhere on the board its 1 POINT, in the holes are marked with the point value. The bean bags just go back and forth. 
6. Bubble gum Blowing contest.
Getting Ready.
1 piece of Bubble Gum
5 pieces of Bubble Gum 
(I think it could have gone bigger but I had to hurry & take it- 4th try)
7. Blow Bubbles.
8. Make Butter.

Gather a 2.5 oz. baby food jar. Fill 1/2 way with heavy cream, 1/8 tsp. salt 
& 2 small marbles or 1 large marble.
Shake . . . . Shake & Shake some more (about 5-10 minutes).
Almost there. 
A little more then you can take the remaining liquid out and use the butter. 
YUM!
9. Block Building.
 10. We did the best Service Project today: painting Beads for Ben's Bells. Its a nonprofit organization wanting to spread the message to "Be Kind".


Pin It Pin It

LinkWithin

Related Posts with Thumbnails