Wednesday, March 31, 2010

Kids Door Decorations

Since I love to decorate for the Holidays our kids wanted to make more decorations for their rooms.


This is what they have on their door everyday {just beads and wire to form the letter}.


This is what we did for Easter. We found a picture in the Oriental Trading Magazine that was a sticker. I just used a template of an egg and traced it into a wreath on wood (but you could use posterboard) and cut it out. They had fun painting them for today's craft.

Tuesday, March 30, 2010

Mall Scavenger Hunt


Since it was raining today this was a perfect activity for the indoors. We went to the mall for a scavenger hunt. We divided up into groups each having 45 minutes to find the items on the list. At the end everyone received a prize(gummy bunny teeth) but the winning group got a little bigger prize (whole pack of "egg" gum).


I had all the boys so this army man was perfect!

Rules: All items were 1 point except on a few. Only 1 item per store.
List of Items: credit card application, perfume sample, mall map, store catalogue, sale flyer, discarded receipt, clearance sticker, hanger, hair salon price list, food sample, gift card envelope, disposable toilet seat cover, sample of lipstick, shoe box, business card-3 points extra if name is Jeff or Tim, shopping bag-3 points extra for the largest one, paper napkin-2 points extra if there is a logo, blue eye shadow-3 points extra if each member of the team is wearing it.
Bonus -10 points: sing "itsy bitsy spider" with someone walking around, take a picture of everyone wearing a hat or purse, all the kids in the group take a picture with a mannequin.

After we would find something on the list we would give them a little "Thank You token"(a piece of paper that says thank you with a smiley face).

FYI tip: Some of the stores didn't believe in us doing this and were a little rude. Let's hope they were just having a bad day.

We did get to see the Easter Bunny though-what a surprising treat!

Monday, March 29, 2010

Recipe "Rater" Cards


I love to try new recipes-it adds to my life as a mother! Our kids are really good about trying everthing. The rule in our house is that they have to try at least one bite. If they don't like it, they don't have to eat it but then they get to fix something else to eat. Its only been a few times that this has happened. Which is a good thing. But I wanted to get my children's input on the recipes I try so I made these cards to Rate the Recipe.

{Close Up}
I just made this on my computer(with some free clipart) and then laminated it for durability and so that the special crayons would wipe off. I bought the "wipe off crayons" at a School Supply Store. If you have older kids you could use dry erase(I don't trust my 3 1/2 yr old with these! He has too many "masterpiece" walls)


They can color in their opinion and when I have seen it, they just wipe it off with a tissue. We will just put them on our kitchen table for easy access.

Super Simple Meat

Yesterday I tried my own recipe so I'm glad it actually turned out! I cooked "bone-in country style pork ribs" in my crockpot (on low) for 6 hours. I dumped a whole bottle of BBQ sauce (hickory maple), 4 beef boullion cubes in 1 cup hot water. That's it! It pulled apart wonderfully and had great taste. {Sorry for the lack of picture}

Saturday, March 27, 2010

Focus Centered Easter

I got this book last year at Seagull and it is Wonderful! It goes thru the last week of Christ's life before He died and resurrected. It has lessons, activities & scripture reading. I am so excited to use it again this year. I'm going to be starting it tomorrow.

I love Easter because its truely all about our Savior and it helps to remind me of all that He did for each one of us. The other stuff is fun but its all "egg-tra"!

Friday, March 26, 2010

Personalized Book of Mormons

Can you tell I love to personalize things? I think it makes each family member feel so special. In our family we read the scriptures in the evening before the kids go to bed. We keep them in the living room for easy access. We read 1 page (each of us reading about 2 verses) and it seems to be just enough to keep attention while yet, still being uplifted. So we all know who's is who's we personalized our Book of Mormons.

Just hold all the pages together and use stamps to stamp family members name(and any other designs).

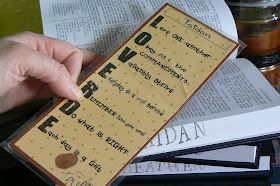
Since we only read 1 page sometimes we forget what side we are on so I made these bookmarks with our Family Mission Statement and whatever side the Statement is facing, is the side we need to read. This has saved us so many times. {Not that its a bad thing to read read the same page}. At the bottom of the bookmark we each signed it and put our "pinky" print. (we do "pinky promises")

Thursday, March 25, 2010

Personalized {Magic} Carpets


Since our children are little and have extra energy during our Family Home Evenings, I figured that maybe having a personalized Magic Carpet would help(at least for the lesson). I am so excited to use them on Monday Night(even though they have already tried them out)!


1-I called around to a few of our local carpet supply stores and asked for the "discontinued carpet samples", they let me have them for FREE (I did have to go back 5 times to keep checking-so worth it though!).


2-In the corner there was a plastic name plate. I just used a really sharp box knife and got as close to the name plate as I could to cut it off.


3-I got similar colored fabric(discounted home furnishing fabric-its thicker) to match the carpet. Cut 4 strips of fabric([2]3 1/2 inch x17 & [2]3 1/2 x 27 inch).


4-Using your glue gun, glue along each edge attaching the strip of fabric. Press down on the fabric, to make sure it adhered. Do all 4 sides and then flip over.


5-Hot glue front side edges. NOTE: I didn't sew any seams!


6-Around all 4 sides cut 1/2 inch slits.


7-Ruff it up by rubbing your hand across back and forth a few times (really fast).


8-To personalize it for each family member, cut a 3 inch wood circle "button". Sand edges really well so its not too sharp.


9-Cut ribbon pieces into 3 1/2 inch strips. Fold in 1/2 & glue to the back side.


10-Finished back side of "button".


11-Using a long thick needle and thin matching ribbon pull thru (using pliers) the carpet.


12-Tie up the button, with double knots.


13-Use a sharpie marker to write the family members' name.


14-All done & ready to use! I will use these for Family Night but I'm also excited to use them for General Conference also.

Tuesday, March 23, 2010

Saying/Quote Board


A while back I used up some left over molding to put this saying above our family picture.

I just painted it black and then "aged" it with some walnut stain. Then added a 1x2 for the top ledge. I love that you could put this board idea anywhere in your home. So Simple!

Saturday, March 20, 2010

{Remembering} Loved Ones


My friend, Megan asked me to make this for her neighbor. The neighbor lost both of her parents within a year from each other. So this neighbor could remember her loved ones, Megan wanted something to place pictures but also be functional. So I came up with this and it turned out so cute!


1-Copy all the pictures into black & white {these are so wonderfully timeless}.


2-Cut picket fence boards (4"X42") in 1/2. I didn't want to buy extra boards so I used the pattern from the top of the board for the bottom half that didn't have a design. I cut it using my scroll saw.


3-I used my nail gun to attach the red board(5"x24") to the fence boards (each measures 21" long). I then sprayed them with a clear spray so the top coat of paint doesn't soak into the wood. This wood is very porus.


4-Paint the fence boards and sand the edges.


5-Attach coat hooks onto the red board. Coil (using a dowel) wire around fence boards to hold the pictures.

Thursday, March 18, 2010

Family Voting Box

There are times in our family where we need to vote on a decision. I found this tin can bank at Target last year after Valentine's day filled with chocolate money. I didn't have any plans for it until now . . . our family voting box.

Before . . .


To cover the face of the box I cut a piece of chipboard and fabric. Glued it together and put a frame with some fabric stripes. Then labeled it with our initial and "vote here" labels.


After . . .

Wednesday, March 17, 2010

Happy St. Patrick's Day!

I love St. Patrick's Day{even though we are not Irish}. It nice to share the luck to everyone and its all about green {= the translation of our last name}. I truely feel so lucky to be able to share on this blog. I have been inspired from above with so many great ideas and its a blessing to then share with everyone who visits this site. I will even wake up early in the morning with ideas. I hope the ideas are not too much, and I hope the "tutes" are well explained because in my heart I know each of us can do it - just in our own "style".

This year for St. Patrick's Day, I am winging it. The kids started their track break (out for 3 weeks)this week and I don't think I was quite ready. So here's what we will do today. Every year I get the kids new green shirts(Walmart $3.50), face paint shamrocks, paint green toenails, and go over how St. Patrick's came to be.


MEALS


Breakfast: Lucky Charm cereal, green clover pancakes(just make the batter a little thicker and do small circles grouped together).


Lunch: (frozen) kid meals & ginger ale with green food coloring


Dinner: roast, green deviled eggs, Irish nachos(slice red potatoes and cook til not crunchy. Arrange the potatos on a cookie sheet then layer with "nacho" toppings: cheese, tomatoes, onions, etc.) Cook until the cheese bubbles. Yummy!


GAMES

1-"if I had a wish, I would wish for..." paper for them to fill out for their scrapbook.
2-"Green Guesses": Each person has a pencil & paper. Each person writes down as many items as they can think of that are green in a certain time frame. If 2 people have the same answer, they must cross it off. the person with the most items is the winner & wins a green prize.


4-Irish Message Sticks: make a key and draw a line on 1 or more craft sticks. Write the message on the top and someone else figures out the answer on the bottom.
5-Pot of Gold throw(throw bean bags into a pot behind a designated line.


6-make green bottle cap necklaces
Drill a hole thru bottle cap and insert a beading pin into bead and bottle cap.
Fill bottle cap with dimension and let sit overnight.
Cut 3 pieces of fabric (1/2 inch x 40 inches) and braid for necklace "chain". When completed tie a knot at each end.
Thru each knot put a beading pin and wrap the end around itself.
Finish it off by adding a clasp and coiled jump ring thru the eye of the pin.
I wish you Luck of the Irish today!


Monday, March 15, 2010

Family Cheer, Song and Mission Statement

Here is my family's Cheer and our Family Mission Statement (a copy kept in our FHE binder so we can go over it and memorize)... (click on image to see better)

This is how I have our mission statement displayed in our home...
Our special family song is the well-known primary song, "Families Can Be Together Forever" which we always sing as the closing song for FHE. (this idea from my dear friend, Rebecca J)


Our motto is not on display, but we always say "The K_____ family stands for truth & righteousness!" (If we ask our children what we stand for, they will say "truth & righteousness")